How to use AssemblyAI to get audio and video transcripts
You can use AssemblyAI to get highly accurate transcripts for audio and video files, and I will explain how you can do this without writing code.
This tutorial supposes that you have a local copy of the video or audio file on your computer
There are two ways to use AssemblyAI to get a transcript.
You can either upload the file directly on the AssemblyAI playground and get just the transcript text.
Or you can call the AssemblyAI API, which requires you to register and create an account and use an API key, and you get the transcript in a format which is easy to repurpose.
Upload your video or audio file to Bunny Storage
Get an account at Bunny Video hosting and upload your file to Bunny Storage. I recommend Bunny Net because they are user friendly and also very inexpensive. You also get a free 14 day trial, and that should be plenty for you to evaluate AudioJots. (And you can usually also find a $5 credit on top of that by doing a web search).
Note: You must use the Storage feature and NOT the Stream feature. Bunny Storage gives you a direct link to the audio or video file, while Stream does not.
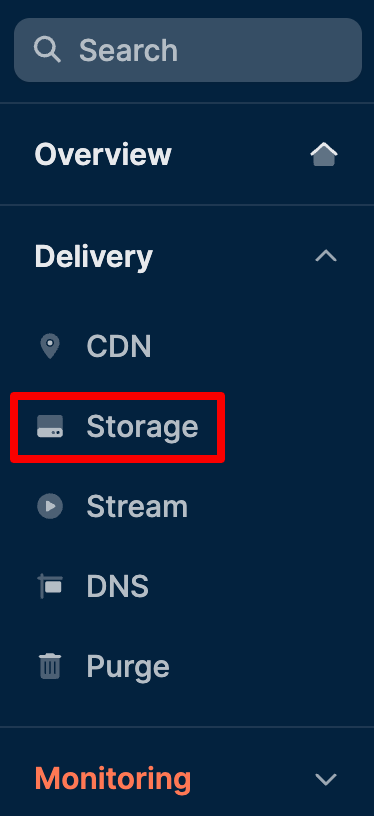
Without a direct link the remaining steps will not work.
Get a direct link to the audio or video file
Once you upload your file to Bunny Storage, you can just right click and Copy the URL.
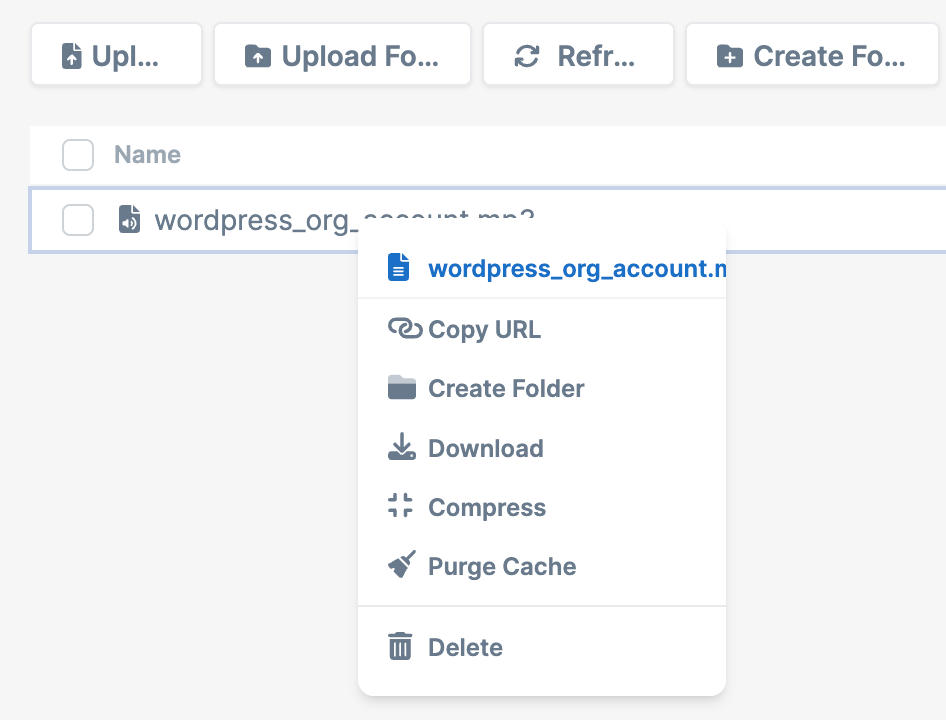
For the rest of the tutorial, you will see that the URL I use for the audio file starts with https://buzzsprout.com/.

That is because in the first version of this tutorial I recommended using a free podcast host for uploading your audio/video files, until I remembered that it is much easier to use Bunny Storage for this step (and almost free).

However, the tutorial steps are the same.
Copy your API key from AssemblyAI dashboard
Create an account on AssemblyAI and login.
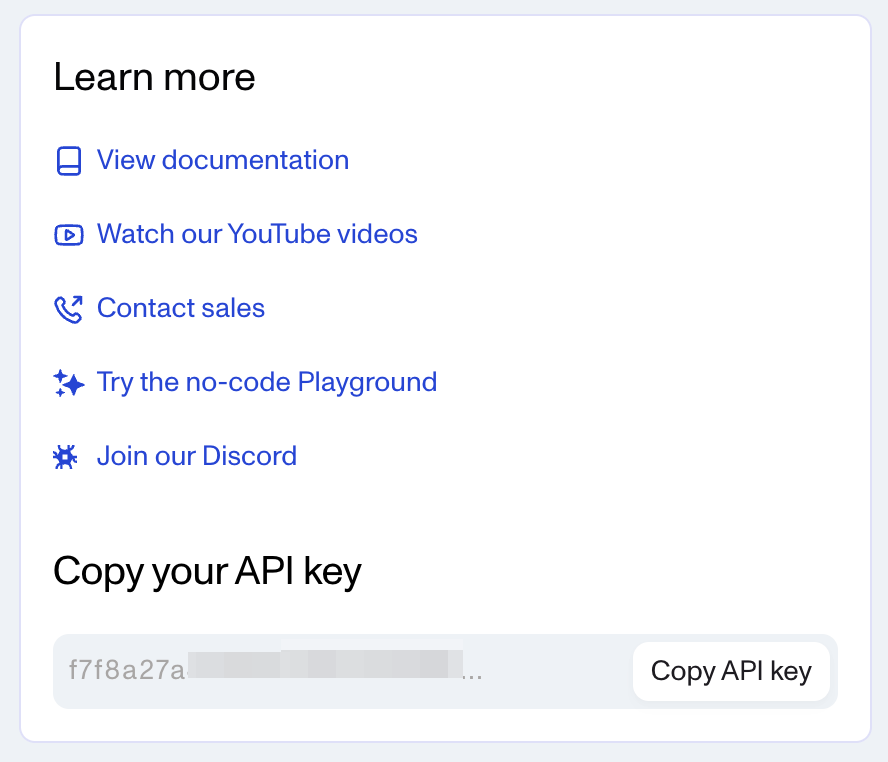
Go to your account Dashboard and copy your API key.
Download Insomnia and copy this cURL command
Insomnia is a desktop API client. This allows you to issue API calls to AssemblyAI without having to use an online service (which could be a security issue) and also allows you to easily inspect and then save the response from AssemblyAI.
Inside the Insomina app, click on + sign and select “From cURL command”
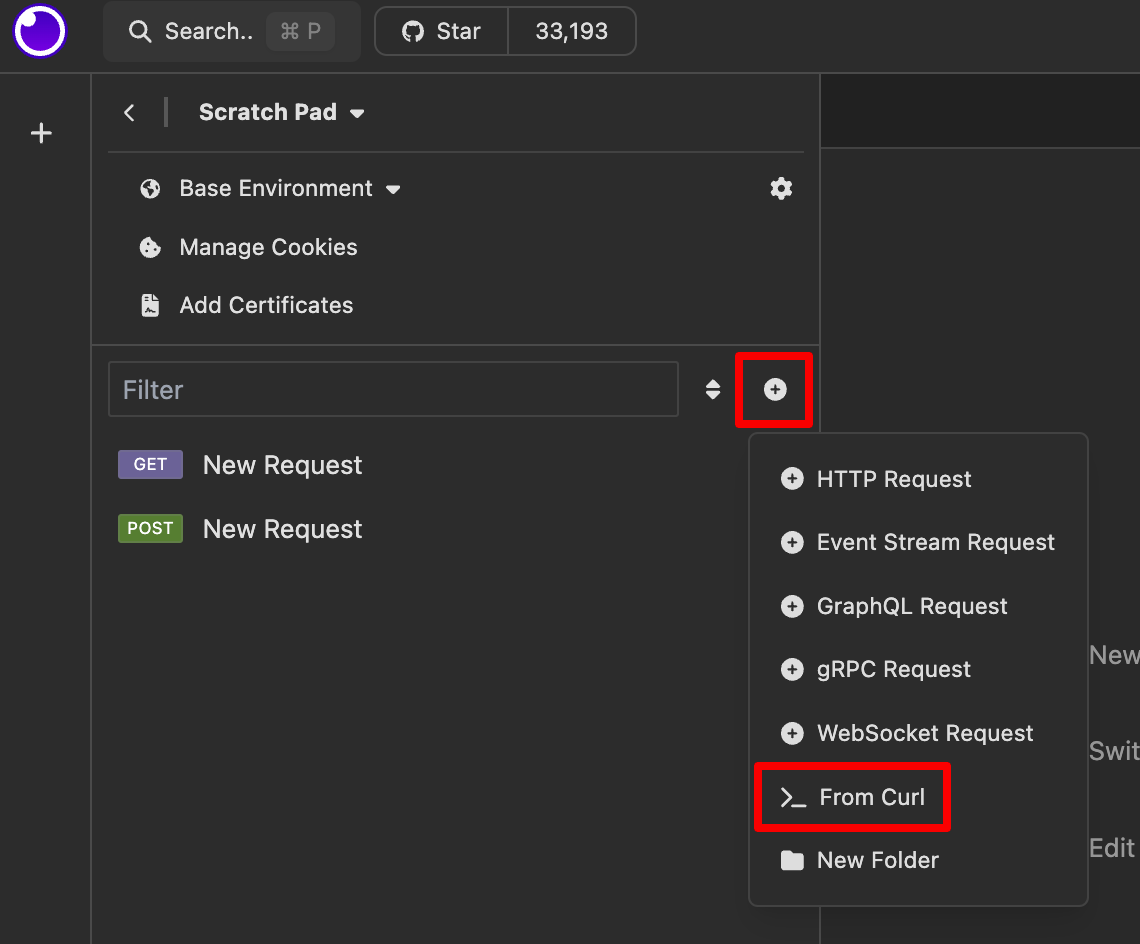
Copy the following cURL command
curl --request POST --url https://api.assemblyai.com/v2/transcript --header 'Authorization: YOUR_API_KEY' --data '{ "audio_url": "direct_link_to_mp3", "speaker_labels": true, "auto_chapters": true }'And paste it into the window
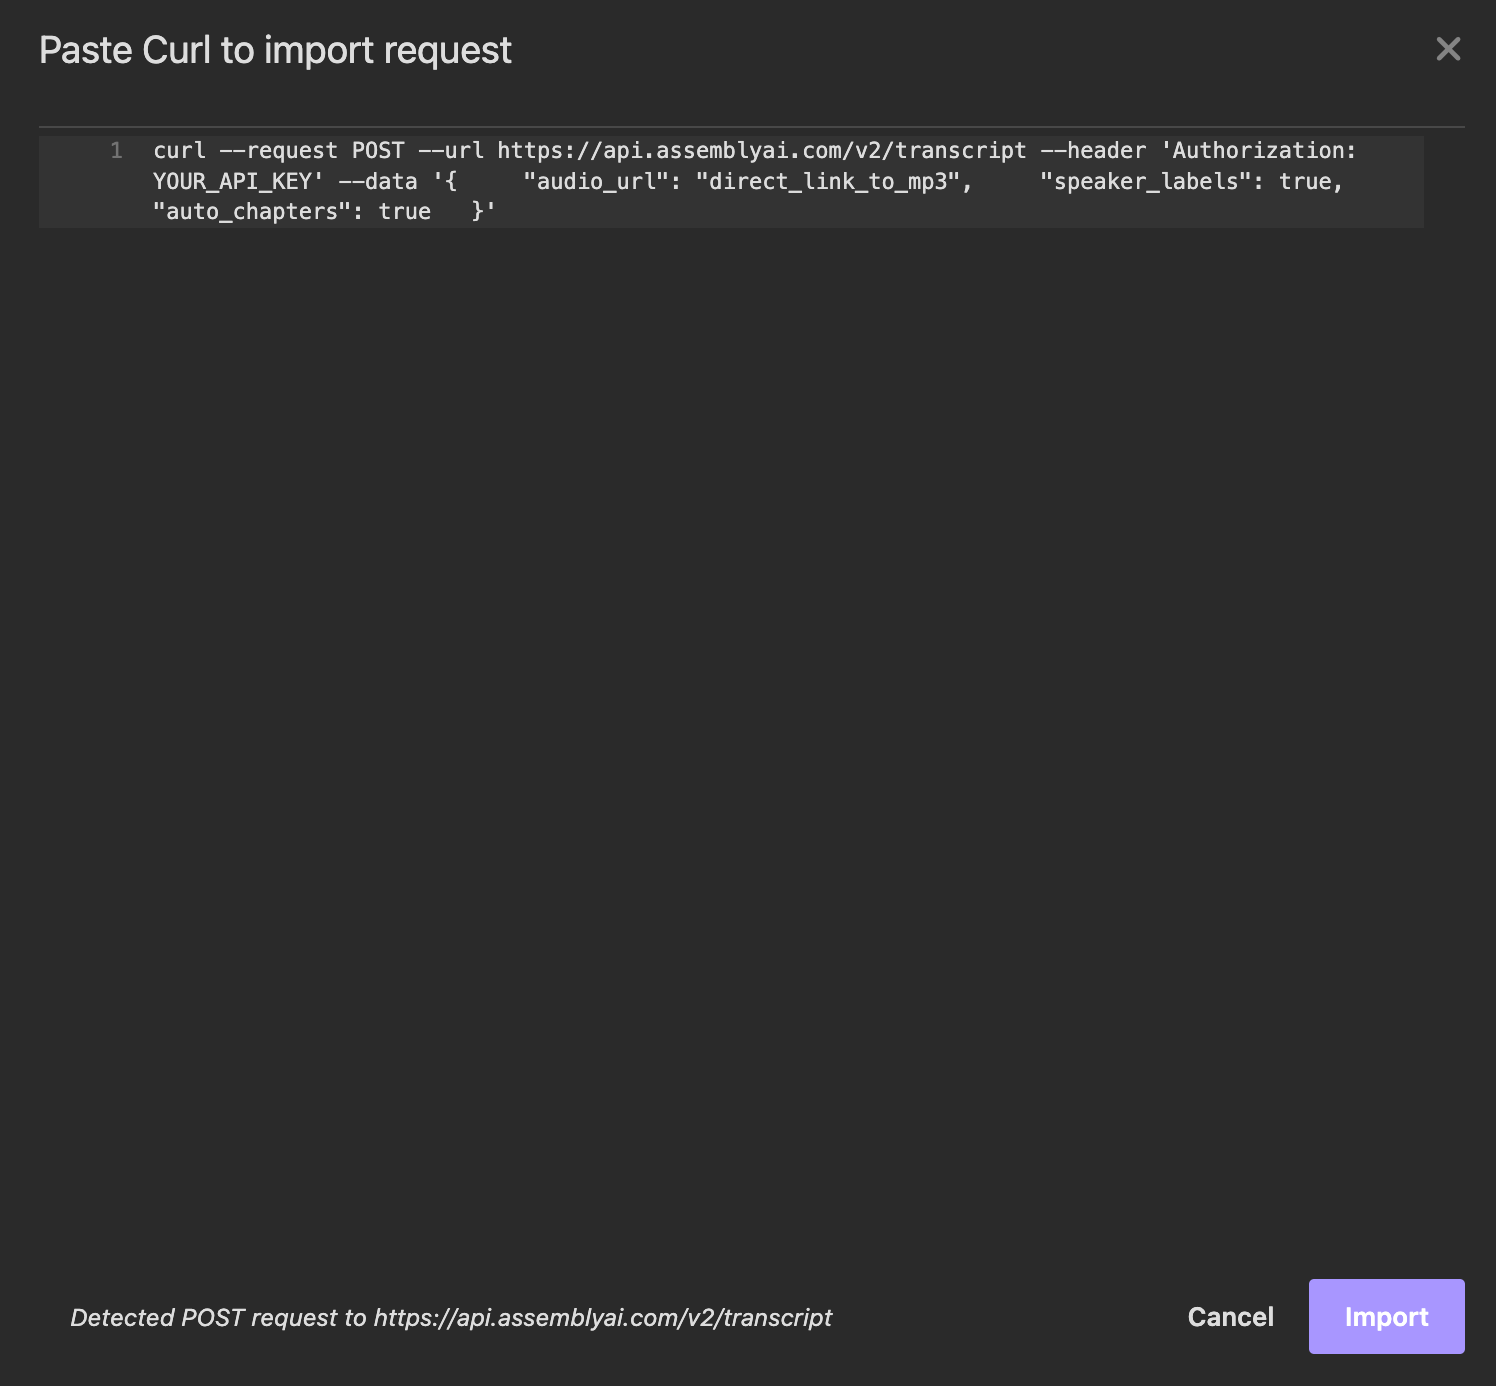
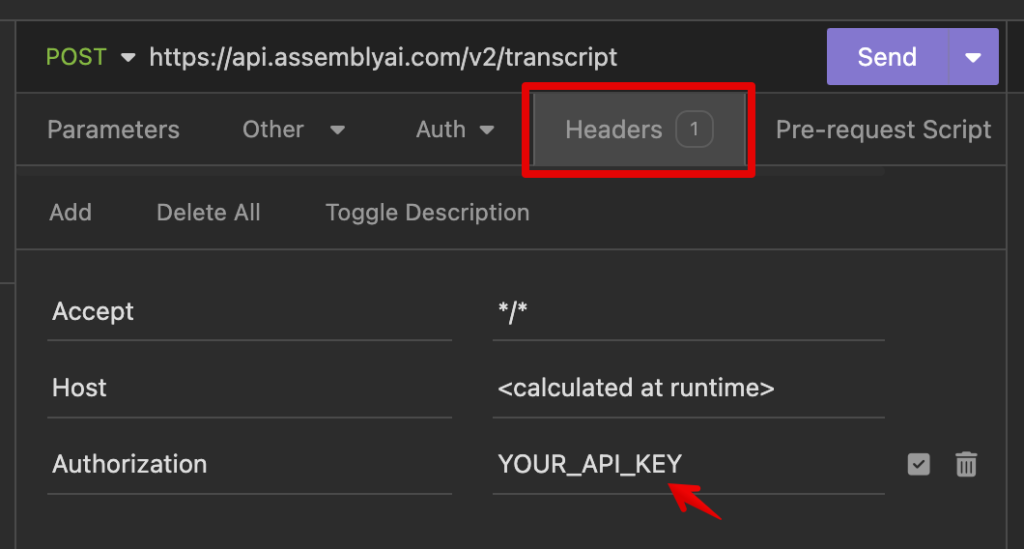
Paste your AssemblyAI API key into the Insomnia cURL request
In the request window, select the Headers tab.
Change the API key to the one you copied from your AssemblyAI account.
Paste the direct link to your audio or video file
In the Other tab, paste the direct link you got from Bunny Storage for the audio or video file.

Issue a POST API request to do the transcription
Now click on the Send button.
You will receive a response which looks like this:
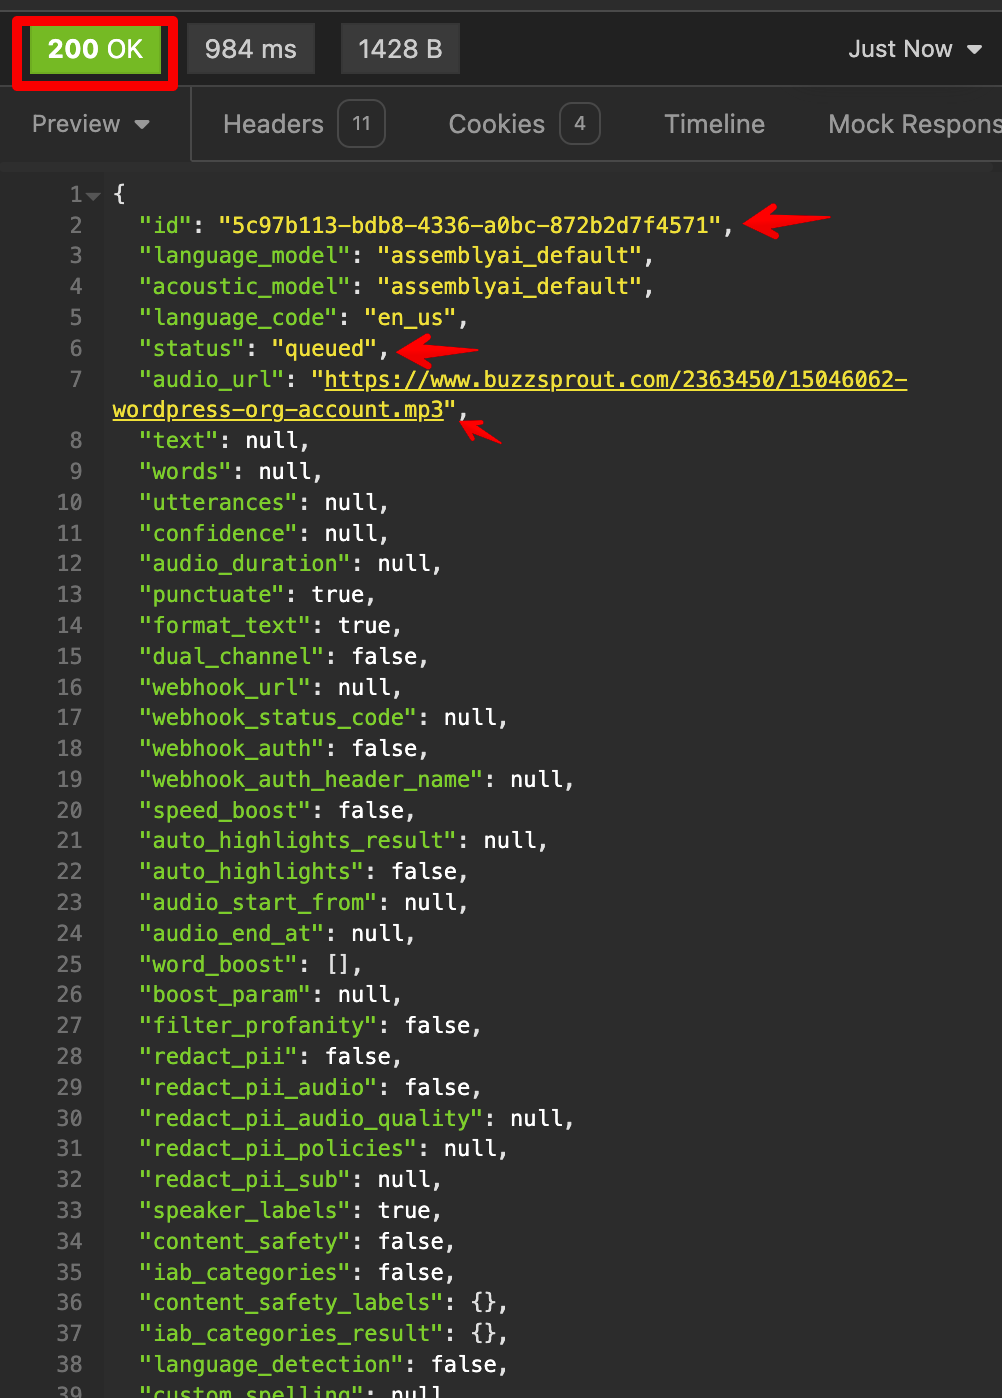
Copy the ID from the top of the response. This is the ID of the transcription job (JOB_ID)
Issue a GET request to get the JSON response
Create a new HTTP request.

In the URL type the following:
https://api.assemblyai.com/v2/transcript/:idIn the ID field under the GET request, paste the job ID from the previous step
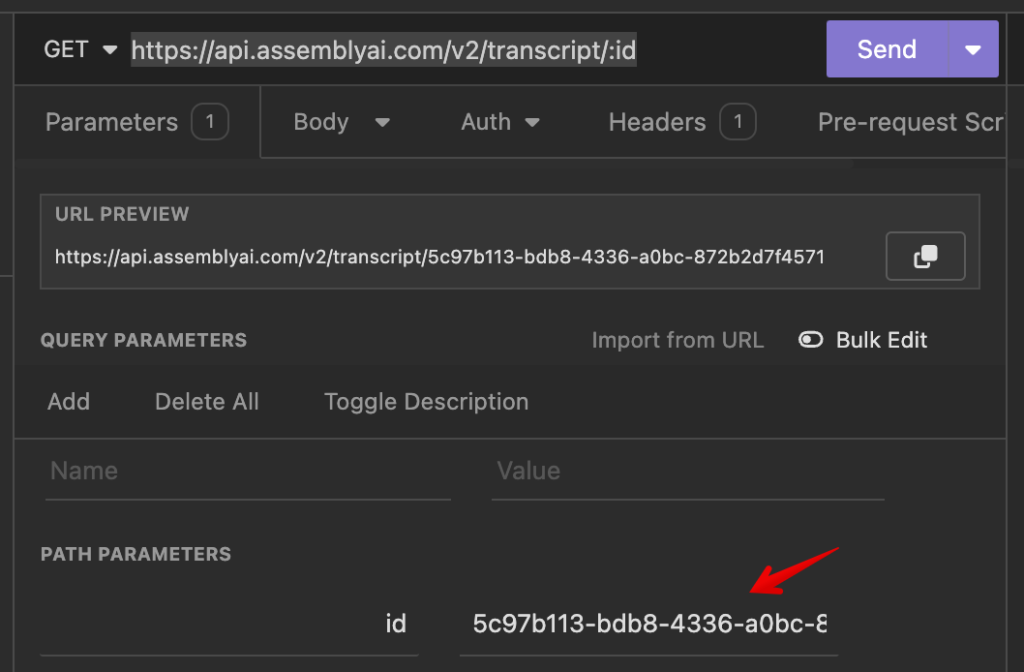
Under Headers, add a new field called Authorization and paste your API key

Click on the Send button.
If you issue this request immediately after the POST request, you will usually see that the status is still “processing”

AssemblyAI provides 100 free hours of audio transcription, but the transcription speed is quite slow for free accounts.
Once you upgrade to a paid account, you will notice that the transcription speed is much faster.
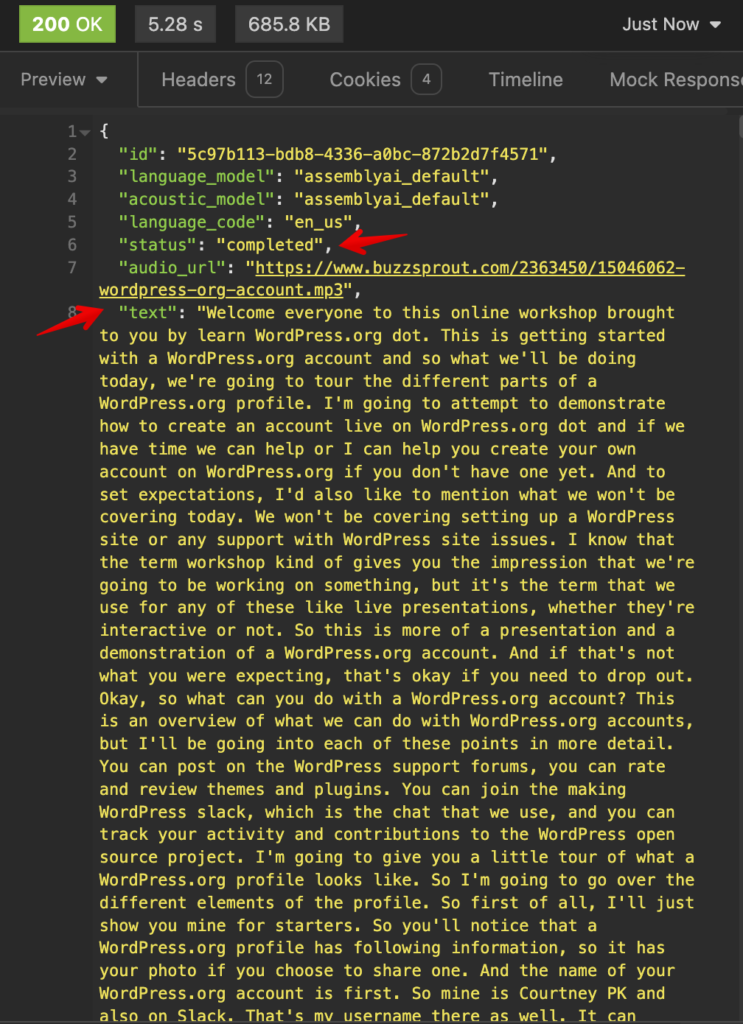
If you send the same GET request (just press the SEND button again, no need to change any parameter) after a few minutes you will see that the status has changed to “completed” and you will also see the transcript in the “text” field.
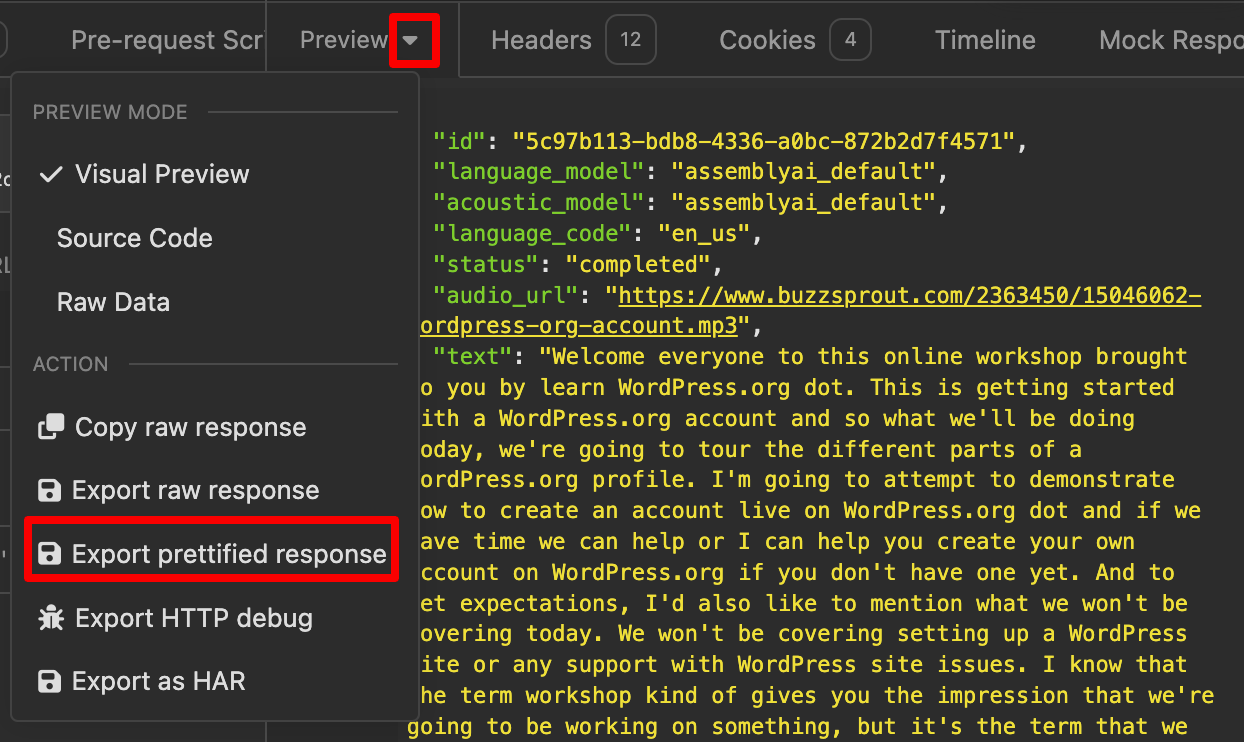
Export JSON response to a local file
Now click on the Down arrow next to the “Preview” and click on Export Prettified response and save it into a JSON file on your computer.
